Home Blog Page 116

Celebrity Recipes that are sure to impress! (part 2)

0

In the first part of this article, I discovered a few recipes for dishes made and/or approved by what I like to call “vintage” celebrities. This description includes Frank Sinatra, Dolly Parton, and Oprah Winfrey. For this part of the article, I would rather discover recipes made and/or approved by newer up and coming celebrity of today.

Antonio Porowski’s Cheesy Lemon-Rosemary Artichoke Dip (thanks to www.parade.com)

Celebrity recipes
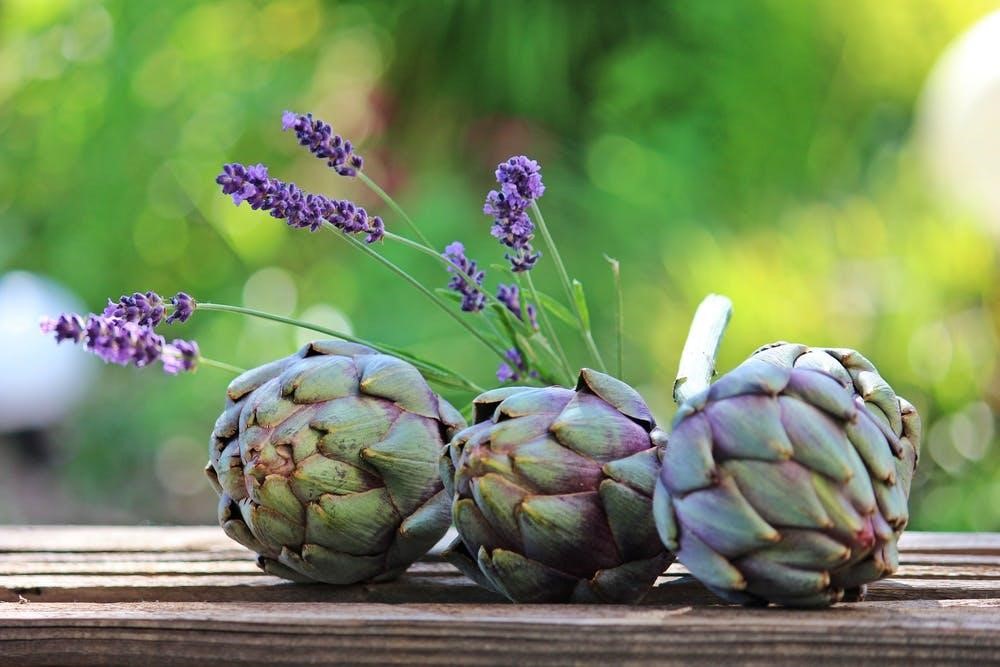
  • 3 (6½ -oz) jars oil-marinated artichokes, drained and coarsely chopped
  • 1 (8-oz) pkg cream cheese, softened
  • 1½ cups grated Gruyère cheese
  • 1 cup grated aged sharp white cheddar
  • 1 cup full-fat sour cream
  • 2 Tbsp fresh lemon juice
  • 2 tsp finely chopped fresh rosemary
  • ¼ tsp freshly ground black pepper
  • Toasted baguette slices, crudités and/or crackers or chips, for serving

Position rack in middle of oven; preheat to 400ºF. In a large bowl, place the first 8 ingredients; stir until well combined. Transfer to an 8-inch square baking dish, a 7- to 8-inch ovenproof skillet or a 2-quart gratin dish. Bake 22-25 minutes or until bubbly and light golden brown on top. Cool 10 minutes before serving with toasted baguette slices, crudités and/or crackers or chips.

 Alicia Silverstone approved Pumpkin Pie with tofu (thanks to www.thekindlife.com)

Pumpkin Pie
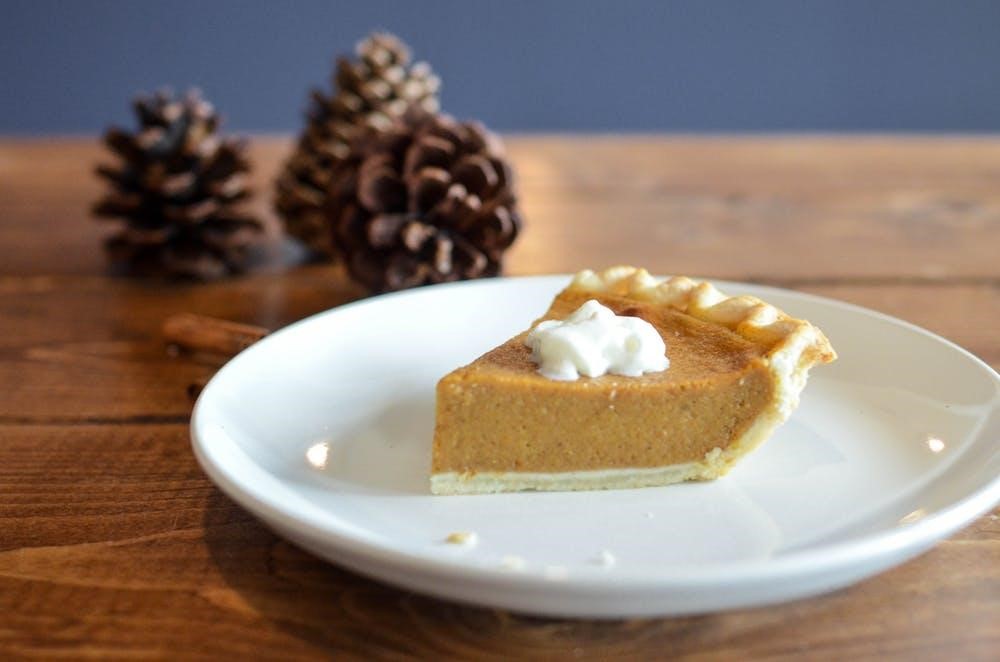
  • 1 can (16 ounces) pureed pumpkin
  • 0.5 cup maple syrup
  • 0.5 tsp salt
  • 1 tsp ground cinnamon
  • .5 tsp ground ginger
  • .25 tsp ground cloves
  • 1 tsp optional ground allspice
  • .5 tsp ground nutmeg optional
  • 3 tbsp cornstarch to firm up the pie filling
  • 1 10-12 ounces package silken/soft tofu
  • 1 9-in unbaked vegan pie shell

Preheat oven to 425 F. Blend the pumpkin and maple syrup. Add salt, spices, cornstarch and tofu, mix thoroughly. Pour mixture into pie shell and bake for 15 minutes. Lower heat to 350 F and bake for another 60 minutes. Chill and serve.

NOTE: Don’t use the low-fat tofu then the pie tastes like it was made with tofu.

Lauren Conrad’s Wedding Apple Pie (thanks to www.laurenconrad.com)

Apple Pie
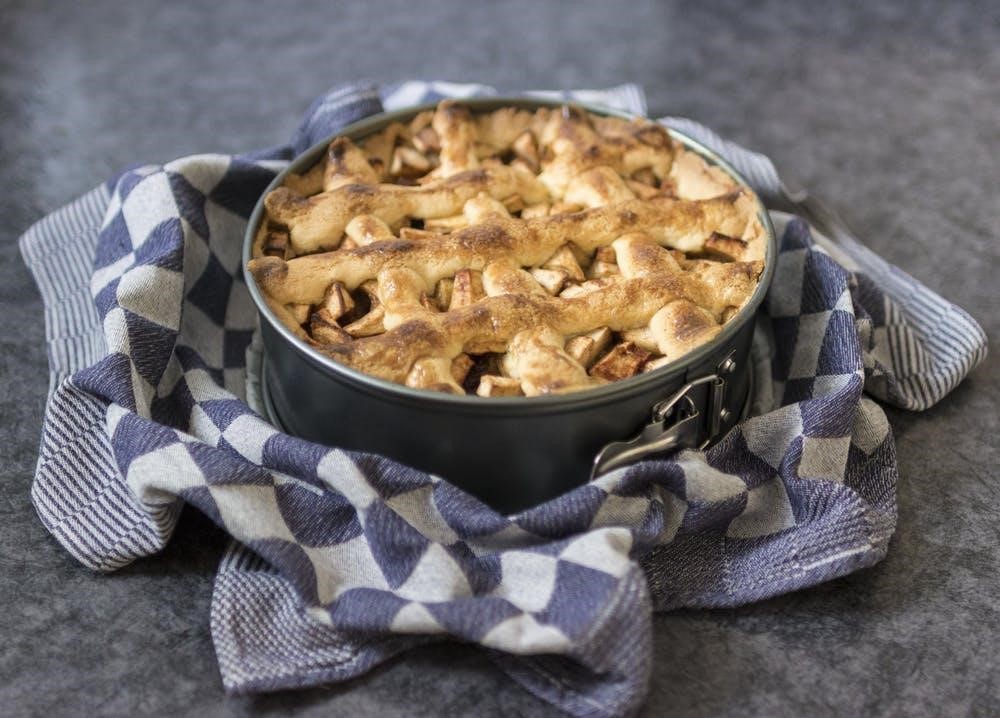
  • 8 Granny Smith apples, peeled, cored, and sliced
  • 1 Tbsp cinnamon
  • ½ cup brown sugar
  • ¼ cup granulated sugar
  • 3 Tbsp flour
  • ¼ cup caramel sauce (recipe below)
  • 1 recipe pie crust, divided into two pieces and refrigerated for at least 1 hour
  • egg wash (1 egg mixed with 1 Tbsp water)
  • sanding sugar

Caramel sauce

  • ½ cup butter
  • 3 Tbsp flour
  • ¼ cup water
  • ½ cup sugar
  • ½ cup brown sugar

Melt butter in a saucepan. Add flour to form a paste. Add water and sugar, and bring to a boil. Turn heat down and simmer for about 10 minutes. (You want the sugars to be melted in and not grainy anymore.) Note: you don’t want to turn this into a dark caramel sauce—just a good sugar/butter mixture caramelizes once baked.

Mix apples, sugars, flour, and cinnamon all together in a bowl.

Roll out your pie dough circles and add one into a pie pan. Add the apple mixture into the pan and drizzle caramel sauce over apples. Cover with another crust and flute the edges. Cut vents in top, or use cut cookie cutters to cut out shapes in the tops of pies. (I do this before adding to the top of the pie.)

Brush top of pie with egg wash, and sprinkle with sanding sugar. Bake pie in a 425-degree oven for 15 minutes. Reduce the heat to 350, and bake for an additional 35 to 45 minutes, until top is golden and the juices are bubbling.

These recipes are undoubtedly going to be crowd-pleasers and will come in handy during the upcoming holiday season! Impress your guests with any one of these celebrity-approved recipes and you will surely be the celebrity of your holiday gatherings!

Celebrity Recipes that are sure to impress! (part 1)

0

Some of our favorite celebrities are chefs such as Rachel Ray or Martha Stewart. However, some of the best recipes can actually come from some unlikely sources! These recipes are from vintage celebrities but each of their dishes are sure to impress!

Dolly Parton’s Coleslaw recipe (thanks to www.food.com)

Celebrity Recipes
  • 1 medium head cabbage, minced
  • 1 medium onion, finely minced
  • 1 carrot, minced (or grated)
  • 1⁄2 bell pepper, finely minced
  • 1⁄4 cup sweet pickle juice
  • 1⁄4 cup white vinegar
  • 1 tablespoon dill pickles, minced or 1 tablespoon pickle relish
  • 1 cup mayonnaise
  • 2 tablespoons sugar
  • 1⁄4 teaspoon black pepper
  • 1 teaspoon salt

Mix all ingredients in a large bowl. Chill until ready to serve. Serves 10-12.

Note: I slightly change the amounts of ingredients for my personal preference and a tarter flavor. I use ½ medium sweet Vidalia onion instead of 1 medium onion and ¼ cup apple cider vinegar instead of ¼ cup white vinegar. Also, I increase other ingredients as follows: 2 carrots, ½ teaspoon black pepper, ¾ cup sweet pickle juice, 1 ½ cups of full-fat mayonnaise. I strongly recommend using only full-fat mayonnaise and not light mayonnaise because the acid in the pickle juice and vinegar breaks down the light mayonnaise into a watery consistency which is not desirable.

Oprah Winfrey approved Unfried Chicken recipe (written by Art Smith, thanks to www.popsugar.com)

Celebrity Recipes
  • 1 cup buttermilk
  • 1 tablespoon Louisiana hot sauce or hot sauce of choice
  • 2 boneless chicken breasts, cut in half
  • 2 chicken thighs
  • 2 chicken legs
  • 1 1/2 cups multigrain or whole wheat
  • Panko breadcrumbs
  • 3 tablespoons grated parmesan cheese
  • 2 teaspoons freshly ground black pepper
  • 1 teaspoon ground cayenne
  • 1 1/2 teaspoons onion powder
  • 1 1/2 teaspoons of garlic powder
  • 1 teaspoon smoked paprika
  • 1 teaspoon salt
  • Optional: 1 lemon cut into wedges

In a large bowl, whisk together buttermilk and hot sauce. Submerge the chicken pieces in the buttermilk mixture, cover, and refrigerate for at least 1 hour but no more than 24 hours.

Preheat the oven to 400°F. In a large zip-top bag, combine the breadcrumbs, parmesan, black pepper, cayenne, onion powder, garlic powder, smoked paprika, and salt. Seal the bag and shake to combine the ingredients.

Remove the chicken from the buttermilk, letting excess drip off, and transfer directly to the bag with the breadcrumb mixture. Shake the bag to evenly coat the chicken in the breadcrumbs. Remove the chicken from the bag and lay flat on a nonstick baking sheet. Place in the oven and bake for 30 minutes, or until cooked through, about 20 minutes. Slice the chicken, arrange onto plates, and serve (with lemon wedges if using).

Frank Sinatra’s Eggplant Parmesan recipe (thanks to www.recipegoldmine.com)

Celebrity Recipes

 Eggplant

  • 1/4 cup all-purpose flour
  • 1/2 teaspoon salt
  • 1 medium eggplant, peeled and cut crosswise in 12-inch slices
  • 1 egg, beaten
  • 1/4 cup vegetable oil
  • 1/2 cup (1 1/2 ounces) grated Parmesan cheese
  • 6 ounces mozzarella cheese

Tomato Sauce

  • 1/2 cup chopped onion
  • 1/4 cup chopped celery
  • 1 small clove garlic, minced
  • 2 tablespoons vegetable oil
  • 1 (14 1/2 ounce) can tomatoes, cut up
  • 1/3 cup tomato paste
  • 1/2 teaspoon salt
  • 1/4 teaspoon black pepper
  • 1 teaspoon parsley flakes
  • 1/2 teaspoon dried oregano, crushed
  • 1 bay leaf

Prepare Tomato Sauce and set aside. Combine flour and salt. Dip eggplant into egg, then into seasoned flour. Sauté the eggplant slices in hot oil in large skillet for 3 minutes on each side, adding more oil if necessary. Drain slices well on paper towels. Place 1/2 of eggplant in a single layer in a 10 x 6 x 2-inch baking dish, cutting slices to fit. Sprinkle with 1/2 of Parmesan cheese, 1/2 sauce, and 1/2 mozzarella cheese. Cut remaining mozzarella into triangles. Repeat layers. Bake, uncovered, at 400 degrees F for 15 to 20 minutes or until hot.

In part two of this article, I will include recipes from. Queer Eye star, Antonio Porowski and other more up and coming celebrities!

Top 10 Cannoli in the world

0

These decadent, fresh fried cake cubes loaded up with tasty ricotta cheese cream are maybe one of Sicily’s best-known pastries outside of Italy. Cannoli are accepted to have started around Palermo during the ninth century, while Sicily was under Arab rule.

Cannoli

History of the Cannoli

Legend has it that they were initially arranged by the ladies of the old city of Qal’at al-Nisā’, the present-day Caltanissetta, which at the time filled in as the group of concubines of a Saracen emir. Later on, the formula discovered its way to the religious communities of Palermo where nuns would set up this luxurious pastry during the festivities.


Cannoli has made some amazing progress from that point forward, winding up inconceivably prominent all through Italy, yet in addition to North America, where they were presented by Sicilian workers in the late nineteenth century. Moreover, on account of one of the most renowned lines from the motion picture The Godfather — “Leave the weapon.

Take the cannoli.” — before the finish of the 1970s, this sweet had achieved a genuinely famous status. Despite the fact that individuals in the United States know about various varieties of this great formula, cannoli in Sicily are arranged in an increasingly conventional manner.

Cannoli


The crispy baked pastry shells are normally seasoned with cocoa, suet, and Marsala wine, while the fragile freshness of the sweet ricotta is once in a while advanced with orange blossom water, sweetened orange peel, chocolate, zuccata candy-coated pumpkin, or finely chopped pistachios.

The name is gotten from canna, a cane reed that is cut into areas and utilized as a form for frying the cake shells, metal cylinders have mostly supplanted canna these days. Furthermore, cannoli shells are constantly filled just before serving to keep them from getting wet, guaranteeing the ideal feel of crunchiness against the creamy filling.

Ingredients and Recipe:


The main ingredients used in Cannoli are ricotta, flour, lard, cocoa, sugar, vinegar, orange blossom water, candied fruits, and marsala.

Cannoli


Sicilian cannoli are made by profound baked good mixture shells in lard or vegetable oil, and afterward filling them with sweet ricotta cream which is regularly enhanced with orange blossom water and blended in with the fruit. Nonetheless, regardless of what the flavorings happen to be, traditional cannoli recipes demand to utilize crisp sheep’s ricotta for the filling. Cannoli are moderately easy to make, yet frying the pastry shells requires a specific level of expertise.

The elements for the cake shells are manipulated into a smooth dough and leveled into a thin layer, either with a moving pin or by going it through a pasta machine. The mixture is then cut into ovals, folded over a tempered steel or aluminum cannoli cylinder, until decent and fresh. The shells need to cool to room temperature, and it is recommended to fill the shells with the ricotta cream just before they are served to keep them from getting delicate and wet.

Cannoli are generally tidied with caster sugar and finished with various types of chopped nuts and sweetened fruit or fruit peel, however, today they can be discovered covered in chocolate and studded with chocolate chips, or even sprinkles.

In Palermo, each finish of a cannoli is studded with a sugar-coated maraschino cherry and each shell is topped with a segment of the candied orange peel, while pistachios are an increasingly basic decision of design all through eastern Sicily, particularly around Mount Etna, where the prized pistacchio Verde di Bronte is developed.

Top 10 :

1. La Pasticceria Maria Grammatico, ERICE, ITALY
2. I Dolci di Nonna Vincenza, ROME, ITALY
3. Ciuri Ciuri, ROME, ITALY
4. Euro Bar, DATTILO, ITALY
5. Pasticceria Savia, CATANIA, ITALY
6. Antica Dolceria Bonajuto, MODICA, ITALY
7. Caffe Sicilia, NOTO, ITALY
8. Laboratorio Pasticceria Roberto, TAORMINA, ITALY
9. Modern Pastry, BOSTON, UNITED STATES OF AMERICA
10. Angelo Brocato Ice Cream, NEW ORLEANS, UNITED STATES OF AMERICA

A Rachel Ray Thanksgiving!

0
Thanksgiving

Rachel Ray is one of the “big hitters” of the culinary world. With her quirky wit and “down-to-earth” style cooking, she is certainly one of the best in the industry! The first time I ever made Thanksgiving dinner for my husband and our friends, I knew I could turn to Rachel Ray for Thanksgiving dinner recipes that would be a hit! If you’re looking for a smashing Thanksgiving dinner, look no further!

Rachel Ray’s Classic Pan Gravy

  • Pan drippings
  •  3.5 cups low sodium chicken broth
  • ¼ cup plus 2 tablespoons flour
  • Salt and pepper
  1. Using a fine-mesh sieve, strain the pan drippings into a large glass measuring cup.
  2. Skim off the fat, reserve ⅓ cup in a small bowl.
  3. Place the roasting pan over medium heat, add 2 cups of broth and bring to a boil.
  4. Stir, scraping up any browned bits, until the broth reduces slightly, about 2 minutes.
  5. Add enough remaining broth to the cup with the pan drippings to measure 1.5 cups, pour it into the roasting pan and bring to a boil.
  6. Whisk the flour mixture into the pan juices; return to a boil.
  7. Simmer, whisking, until thickened, about 5 minutes. Season to taste.
Brussels Sprouts

Rachel Ray’s Manchego-Almond Brussels Sprouts

  • 2 pounds Brussels Sprouts, halved lengthwise
  • 3 tablespoons vegetable oil
  • Salt and pepper
  • ⅓ cup sliced almonds
  • 1 lemon, zested, plus 1 tablespoon juice
  • 1 ounce shaved manchego (can also use Parmesan or pecorino)
  1. Preheat the oven to 450 degrees Fahrenheit
  2. On a rimmed baking sheet, toss the Brussels Sprouts with the oil.
  3. Season, then arrange Brussels, cut side down.
  4. Roast for 10 minutes
  5. Sprinkle the almonds on top; continue roasting until the Brussels are crisp-tender and beginning to brown and the almonds are toasted, 5 to 10 minutes.
  6. Transfer to a bowl.
  7. All the lemon zest, lemon juice and half the cheese to the Brussels.
  8. Toss to coat, season and top with remaining cheese.
Roast Turkey

Rachel Ray’s Classic Roast Turkey

  • 1 12-15 pound turkey
  • 6 tablespoons butter at room temperature
  • Salt and pepper
  • 2 ribs celery, cut into 2-inch pieces
  • 1 onion, quartered
  • 2 cups low sodium chicken broth
  • 2 tablespoons extra virgin olive oil for brushing (Rachel calls it EVOO)
  1. Let the turkey stand at room temperature 1-2 hours
  2. Place a rack in the bottom third of the oven; preheat 425 degrees Fahrenheit
  3. Under the skin: carefully slide your fingers between the skin and the breast meat. Spread the butter (mixed with desired seasonings) evenly under the skin, into the breast meat and the tops of the thighs.
  4. Tuck the wings behind the turkey.
  5. Place it, breast side up, on a rack in a large roasting pan.
  6. In the cavity, season the cavity with salt and pepper, then stuff with the celery and onion.
  7. Using kitchen string, loosely tie the legs together.
  8. Season the turkey all over with salt and pepper.
  9. Pour the broth into the roasting pan.
  10. Roast the turkey for 1 hour.
  11. Rotate the pan, reduce the oven temperature to 375 degrees Fahrenheit and continue roasting until an instant-read thermometer inserted into the thickest part of the thigh (don’t touch the bone) registers 155 degrees Fahrenheit, 1.5 to 2 hours.
  12. On the roasted bird: transfer the turkey to a serving platter.
  13. Reserve the roasting pan and pan drippings for gravy
  14. Brush the extra virgin olive oil all over the turkey, season.
  15. Tent the turkey with foil and let stand at least 20 minutes before carving.
Thanksgiving

My notes

I remember being so nervous about making such an important holiday meal for the first time. I knew I was in good hands with these recipes and I would happily turn to them and many others of Rachel’s when I am in need of elevated home cooking.

I chose to follow each recipe as closely as I could. However, I did make a few tweaks. For example, in addition to the butter under the turkey skin (super weird task to complete, by the way) I mixed in fresh herbs, garlic, and salt. I also made Rachel’s Rosemary Mashed Potatoes and her Marble Rye and Apple Stuffing.

Choosing the right mushrooms is not “magic”

0

Choosing the right mushrooms is not “magic”

Mushrooms are great supporting ingredients in some recipes and can even play the role of “the star” in others. But, how do you know which type of mushroom to use and how can you tell if the mushrooms in your yard are safe to eat? I spent a good chunk of this last Spring trying to better understand this versatile fungus.

What are mushrooms?

mushrooms

Mushrooms are the “fruit” or body of fungus that usually is found above ground or on the food source of the fungus. The edible types of mushrooms are also quite nutritious! They are great sources of protein, B vitamins, copper, potassium, vitamin D and Selenium.

What types of mushrooms are edible?

It should come as no surprise that not all mushrooms should be or can be eaten. Some of them should be avoided due to their poisonous qualities and others simply because they are bad tasting. There are also mushrooms that are technically edible although they are typically consumed to initiate a hallucinogenic trip. These, are of course known as “magic mushrooms” or “shrooms”. The following mushrooms are some of the more well-known and they are edible.

The Chanterelle Mushroom

mushrooms

These are funnel-shaped mushrooms that can be seen in orange, yellow, or white. They are a wild and meaty type of mushroom. They can be cooked and eaten on toast, in pasta dishes made unto a soup, or roasted and eaten on their own. Experts in the field of mushroom hunting recommend avoiding the darker and ombre orange-colored chanterelle mushrooms that are said to upset the stomach and have a very bad taste to them, although not poisonous.

The Common white-capped mushroom

mushrooms

These mushrooms are widely grown in Europe and most of North America. The “immature” white stage of these mushrooms are known as button mushrooms or common mushrooms. They are edible and are often added to pizza as a topping or maybe stuffed with cheese and other ingredients. The “immature” brown stage of the common mushroom is known as a cremini or chestnut mushrooms. They are good sources of potassium and protein. They would be great additions to spaghetti dishes, risotto, or chicken.

The Shiitake mushroom

These mushrooms are a type of edible mushroom found in Asia, mainly Japan. They are a great source of carbohydrates, protein, vitamins including niacin, folate and vitamin C. They are also known for their phosphorus, potassium, and selenium. They can be sauteed and added to pastas, impaired with asparagus, or included in a stir-fry.

How can you tell if a mushroom is poisonous?

mushrooms

The best way to know for certain if a mushroom is poisonous or not is to use a staining and examination technique used on spores. There are informational books on the subject of hunting and identifying mushrooms, however there are some species of mushrooms that closely resemble edible species when in fact they are poisonous. The best way to avoid any accidental poisoning is to follow the motto: when in doubt, let it be!

How to make the mushroom the star of the dish!

mushrooms

In the above-listed types of mushrooms, I briefly mention ways to incorporate them into various dishes. However, mushrooms can be the main event! This can be done by making stuffed mushrooms. They can be stuffed with a variety of ingredients. My husband has a secret recipe for jalapeno and cheese stuffed mushrooms. I don’t know the full recipe but I can confirm that he uses cream cheese, jalapenos, cheddar cheese, and 4-5 different hot sauces. I personally recommend using the large portobello mushroom caps to make portobello mushroom cap burgers or adding sauce, cheese, and other toppings to make portobello mushroom cap pizzas!

WTF: Understanding Japan’s “Live Sushi” Meals

Back during the 50s and 60s, having meals that didn’t involve French or Italian cuisine was considered to be “weird” by mainstream Americans. Thankfully, Western culture has become way more interested in exploring different flavor profiles lately. We now gladly nosh on tandoori, chow down on chow mein, and try halal takeout on a regular basis.

That being said, there are still some culinary traditions that are considered to be taboo or verboten by Westerners. One of the most verboten practices in the West is eating animals of any sort alive—a practice that is still somewhat common in both China and Japan.

Live Sushi: Ikizukuri
İmage: Wikimedia Commons

What Is Ikizukuri? ( Live sushi )

In Japan, the practice of eating “live sushi” is called ikizukuri. While its popularity is waning due to (rightful) concerns about animal cruelty, it still is fairly common due to its rank as a culinary status symbol. The reason for ikizukuri’s high status deals with the fact that keeping the animal alive shows how fresh the fish really is.

The practice is one that tends to bring out the crueler side of food. Not only are fish sliced while alive, but the organs are kept intact in order to keep the fish alive for as long as possible. In some cases, chefs may actually put the meals-to-be back in water for a brief recovery period prior to serving.

Ikizukuri

Why Do People Eat This Stuff?

As mentioned before, sushi venues in Japan are critiqued based on the freshness and quality of their fish. In the Japanese restaurant scene, proving that you have live fish that you’re willling to serve up is a way of proving quality. To a point, it’s even considered to be a status symbol by critics overseas.

Health-wise, the concept of eating live animals can appear risky, though it’s technically not. Raw food, including live food, contains enzymes that ease digestion, improve immunity, and also help your body maximize its energy intake. That being said, you could get the same enzymes through eating regular sushi that doesn’t put a fish through hell.

octopus

My Personal Verdict

As a food critic, I know I’m supposed to be open-minded about my meals. Even so, I honestly can’t see myself eating this without feeling disgusted with myself. Certain things should remain taboo, and that includes acts of horrific cruelty like ikizukuri.

Come on, people. There’s no reason to make food suffer more than it has to. Even if you understand the concept, why would you support it?

Small Appliance Cooking(part 2)

0

With my favorite recipes for each method!

In part one of this article, I discussed my crockpot, my air fryer, and my rice cooker. The following are a few more appliances and my family’s favorite recipes for each of them!

My waffle maker

appliances

I bet you’re expecting a waffle recipe for this appliance. I hate to disappoint you, but I am sure that my very special grilled tater tot cheese sandwich recipe made in the waffle maker, will be a big hit! 

Ingredients

  • A bag of your favorite brand of tater tots (I am fond of the “Made in Idaho” brand)
  • Cheese slices of your choice (I prefer smoked gouda, cheddar, or mozzarella slices whereas my husband prefers jalapeno cheese)
  • Optional additions such as cooked bacon strips, ham slices, jalapeno slices, or vegetables
  • A waffle iron
  1. Turn your waffle iron on and allow it to begin heating
  2. Layer your tater tots together, closely in the size and shape of your desired sandwich (this will be your sandwich base)
  3. Close the lid of your waffle iron and allow the tots to cook and crisp together
  4. When they are cooked through and at your preferred crispiness, remove that layer (it should stay together in a “bread slice” way) and set it aside
  5. Repeat steps 2 through 4 to make the second “bread slice” of tots
  6. Once this slice is cooked through, remove it and set it aside
  7. Build your tot grilled cheese as you wish and return the entire sandwich to the waffle iron
  8. Close the lid and allow contents to cook together
  9. Remove sandwich, serve with a bowl of soup and enjoy!
appliances

My stand mixer

I have a red Hamilton Beach stand mixer that I love and it has served me well. My family loves when I bring it out of the cabinet because it means mama is baking! Now, I have tried several varieties of baked good recipes from cookies to brownies to pies to cakes. And while my family will eat just about anything I make, this recipe seems to be one of their favorites!

Reese’s Peanut Butter Cupcakes

(thanks to www.tastesbetterfromscratch.com

Ingredients

For the Chocolate Cupcakes*

  • 1 box chocolate cake mix
  • 4 large eggs
  • 1 cup milk
  • 1/4 cup oil (vegetable or canola oil)
  • 2 heaping Tablespoons plain Greek yogurts
  • 30 mini Reese’s Peanut Butter Cups, divided

For the Peanut Butter Frosting:

  • 1/2 cup butter (1 stick), room temperature
  • 1 1/2 cups creamy peanut butter
  • 2 cups powdered sugar
  • 1 teaspoon vanilla extract
  • 2-3 Tablespoons milk
Instructions
  1. Preheat oven to 350 degrees F. Line 2 regular muffin tins with cupcake liners.
  2. Mix together the cake mix, milk, eggs, oil, and Greek yogurt until smooth.
  3. Spoon batter into cupcake pans, filling the liners 1/2 full.
  4. Place a Reese’s PB cup into the center of the batter in each cup (it’s okay if the tops of the Reese’s are showing).
  5. Bake cupcakes for 16-20 minutes or until done. Allow to cool completely before frosting.

For the Peanut Butter Frosting

  1. Beat together butter, and peanut butter and mix until smooth.
  2. Add powdered sugar and vanilla and beat again until combined.
  3. Add milk and mix until light and fluffy. (Add more milk or powdered sugar if needed to make the frosting thicker or thinner).
  4. Frost cupcakes
  5. Chop up the remaining pieces of Reese’s and gently press into frosting.
  6. Store leftover cupcakes, covered, in the fridge for 3-4 days.

My ice cream maker

appliances

Our ice cream maker is another well-loved appliance. It’s a stainless steel Cuisinart machine that even comes with its own recipe book! The following is my personal favorite from the Cuisinart Recipe Booklet!

Simple Chocolate Ice Cream

  • 1 cup of unsweetened cocoa powder
  • ⅔ cup of granulated sugar
  • ½ cup firmly packed brown sugar
  • 1 ½ cups of whole milk
  • 3 ¼ cups of heavy cream
  • 1 tablespoon pure vanilla extract
  1. Place the cocoa and sugars in a medium bowl, stir to combine
  2. Add whole milk and mix on low speed or whisk
  3. Stir in heavy cream and vanilla
  4. Turn machine on
  5. Pour mixture into freezer bowl
  6. Let mix until thickened (25-35 minutes)
  7. Scoop and serve!

Worldwide delectability: North and South America

There are far too many tasty dishes around the world to be listed here in a single article. But, I was curious to find out what the most palatable cuisines are based on the continent. As it turns out, even breaking the world up into continents doesn’t cover the variety of the most delicious cuisines around the world. So, the only way to avoid an endless list of deliciousness and delectability from every corner of the world is to pick one from each continent that could properly represent that continent in particular. In this article, I will discover the most delicious dish in North and South America!

The Continent of North America

North America is home to several countries including The United States, Canada, Mexico, Greenland, Cuba, The Bahamas, Puerto Rico, and the Dominican Republic. There are roughly 580 million people living here. When trying to determine which dish I should feature for this continent, I found that a common ingredient across the continent was chicken. So, I chose a chicken dish that is a favorite amongst many!

Fried chicken is a very common dish made in the southern parts of the United States and can be spiced up with some Cuban flair to fit some of the styles in the other North American countries.

Jason Severs from Three Angels Dinner shared his recipe on www.foodnetwork.com for Fried Chicken that must be tried!

  • 2 whole free-range, organic chickens
  • Vegetable oil for frying
  • 6 cups of all-purpose flour
  • 5 tablespoons of salt
  • 4 tablespoons of ground pepper
  • 2 tablespoons of garlic powder
  • 1 tablespoon of onion powder
  • 2 teaspoons of cayenne pepper
  • 2 cups of buttermilk

The instructions for this recipe are as follows:

  1. Cut the whole chickens into 4 breasts, 4 thighs, 4 legs, and 4 wings. Set aside
  2. Preheat the oil in a large stovetop pan or a deep fryer to 325 degrees Fahrenheit
  3. In a large bowl, combine the flour, salt, black pepper, garlic powder, onion powder, and cayenne pepper until thoroughly mixed. Set aside
  4. Pour the buttermilk into another bowl large enough for the chicken to be immersed in the buttermilk
  5. Prepare your dredging station. Place your chicken in a bowl. Then, your bowl of buttermilk, and then the dry mixture
  6. Dust chicken pieces with flour, dip in buttermilk until coated and put in flour mixture. Make sure the flour is aggressively pushed into the chicken to achieve proper coat
  7. Put in oil
  8. Repeat for each piece of chicken
  9. Cook for 15 minutes or until internal temperature reads 180 degrees Fahrenheit
  10. Remove from oil and let excess oil runoff and chicken to cool for 5 to 10 minutes
  11. Serve

The Continent of South America

The final continent to discuss is South America. There are about 422.5 million people living there and most of them speak Portuguese or Spanish. Countries in South America include Brazil, Argentina, Peru and many more! There are so many cuisines to try from this part of the world that are certainly delectable! However, I chose Classic Peruvian Ceviche!

Ceviche is a raw fish dish, originally from Peru. While the fish is considered “raw” it is also considered “cooked” from being marinated in acidic citrus juice.

Ingredients for ceviche are as follows (thanks to www.thespruceeats.com):

  • 1 pound of white saltwater fish(albacore, sole, snapper, or halibut)
  • 1 tablespoon salt
  • 1 cup lime juice
  • ½ cup lemon juice
  • ½ cup orange juice
  • 1 medium onion sliced thin in half moons
  • 1 rocoto chile (or 2 aji Limon chile or habanero)
  • 4 tablespoons cilantro, chopped for garnish

Instructions are as follows:

  1. Cut the fish into small pieces. You can side it or leave it in pieces up to 1-inch square
  2. Salt the fish, cover with all the juices in a glass or plastic container with a lid.
  3. Add onions and chiles
  4. Chill mixture in the fridge for at least 2 – 3 hours
  5. Serve on a plate or bowl. Lay onions and chiles in first, then top with fish and finish with cilantro.

Resources for recipes: www.foodnetwork.com and www.thespruceeats.com

Making the switch: Bread

0

Deciding to switch some of the food in my diet to their healthier counterparts may seem difficult. In some cases it is! However, I am choosing to live a healthier life without sacrificing food or flavor. This week my switch of choice is bread!

bread

I have rarely bought white bread, although my recent trip to a local bakery for fresh Italian bread may become a more regular occurrence in the future. For as long as I can remember I have bought whole wheat bread from various grocery stores and brands. I rarely found a brand that I did not enjoy, though I preferred whole wheat bread with oats on the top crust. The extra texture is quite pleasing. You may be thinking, why would you choose to switch a seemingly healthy type of bread that you enjoy? The answer is simple, because I am choosing a healthier life!

The Switch to Multi-grain bread

True whole wheat bread is made with ground whole wheat flour that does not include any enriched white flour of any kind. Some whole wheat bread brands are labeled as being “whole wheat” but are falsely labeled. This is also true of several other types of bread labels including “organic” and “preservative-free”. It is up to the consumer to read the ingredients list to make sure they are getting the real deal.

bread

White bread is made with highly processed flour and additives which contribute to obesity and diabetes. Thus making the bread far less healthy. Whole wheat bread is a healthier choice compared to white bread as it is made with whole wheat flour and thus provides a good source of fiber and carbohydrates. But, still, the healthiest bread is multigrain.

Bread

Multigrain bread contains several types of grain that are meant to improve the nutritious value of the bread. Primarily the fiber content of the bread which is appealing when trying to lose weight or increase fiber intake. Most multigrain breads include 12 or more grain types which frequently include flax, oats, barley, millet, wheat, whole wheat flour and will likely also include quinoa, flaxseed, chia seeds, and maybe even pumpkin or sunflower seeds.

I chose to switch my whole wheat bread with oats on the crust for Arnold brand Whole Grain Healthy Multi-Grain bread. This brand is wonderful as they use quality ingredients, do not include artificial preservatives, colors or flavors, and it is an excellent source of fiber. It is important to choose based on the ingredients list. The first five ingredients listed are the most important as they are listed by quantity in the product. In the multigrain bread I chose, the top five ingredients are as follows:

  • Whole wheat flour
  • Water
  • Wheat gluten
  • Sugar
  • Bulgur Wheat

The ingredients list goes on to include the various seeds and yeast that were also included in the making of the bread.

bread

I was truly hesitant when I first made the switch to the multigrain bread. I had tried other brands in the past and they were the equivalent of chewing on cardboard. So, one morning I made my eggs as I do most mornings, sunny side up. I made my toast using the multigrain bread and butter. Still feeling hesitant, I finished making my breakfast and sat down to eat. With the first bite of this new bread, I found the flavor did not resemble cardboard at all. I felt my previous hesitation slipping away with each bite. By the end of my breakfast, I was beyond full! I stayed full for several hours.

I have since found myself quite fond of multigrain bread, especially this brand. I plan to stick with it and feel as though this was a simple switch for me. Now, if I had been a strict white bread eater then maybe the switch would have been more difficult. Multigrain bread is the far healthier option over white bread, though.  So, if you can, you should make the switch, too!

Small Appliance Cooking(part 1)

0

With my favorite recipes for each method!

I don’t know about you, but I have so many small appliances in my kitchen cabinets that I couldn’t possibly actually need them all, right? Wrong! Surprisingly, I use each of them quite frequently and couldn’t imagine making a meal for my family without them. The following are some of my favorite recipes to make with each type of small kitchen gadget.

My crockpot

small appliances

I have a red Hamilton Beach crockpot that I use at least once a week. I have so many favorite recipes for this appliance but, this one is definitely top 3!

Slow cooker cheesy chicken, broccoli and rice casserole (thanks to www.365daysofcrockpot.com

Ingredients
  • 1 cup minute brown rice
  • 2 cups chicken broth
  • 1 tsp minced garlic
  • 1/2 tsp kosher salt
  • 1/4 tsp black pepper
  • 1 lb boneless, skinless chicken breasts
  • 12 oz frozen broccoli florets
  • Salt and pepper, to taste
  • 2 cups extra sharp cheddar cheese
Instructions
  1. Pour the rice in the bottom of your slow cooker. Pour broth on top of the rice. Sprinkle in the garlic, salt, and pepper.
  2. Cut the chicken breasts into small bite size pieces. Spread them evenly in the slow cooker.
  3. Evenly place the broccoli on top of the chicken breasts.
  4. Cover and cook on LOW for about 2-4 hours, until chicken is cooked through and rice is cooked through.
  5. Salt and pepper to taste. Stir in 1 cup of the cheddar. Then sprinkle the remaining cheese on top. (I like to let the cheese on top melt a bit. I put mine under the broiler in the oven for just 2 minutes.)
  6. Scoop onto serving plates and enjoy!

My Air fryer

small appliances

I have a Nuwave brand air fryer that I adore! I have made several recipes in it including “fried” chicken, French fries, pizza logs, tater tots, and homemade potato chips. But, my favorite food to make in my air fryer is Brussels sprouts for sure!

Perfect Air Fryer Brussels Sprouts (thanks to www.glueandglitter.com)

Ingredients
  • 2 cups Brussels sprouts – sliced lengthwise into 1/4″ thick pieces
  • 1 tablespoon olive oil OR maple syrup*
  • 1 tablespoon balsamic vinegar
  • 1/4 teaspoon sea salt
Instructions
  1. In a bowl, toss together the Brussels, oil or maple syrup, vinegar, and salt.
  2. Air fry at 400F for 8-10 minutes, shaking (and checking their progress) after 5 minutes and then at the 8 minute mark. You’re going for crispy and browned, but not burnt!

My Rice Cooker

small appliances

The rice cooker is the Aroma brand, stainless steel. I don’t use this appliance quite as often as the others, in fact, my husband usually turns to the rice cooker when he does the cooking. He loves this recipe and seems to stick with it!

Rice cooker teriyaki shrimp and rice (thanks to www.budgetbytes.com)

Ingredients
  • 1/2 lb. raw medium shrimp (41/50 size)* (deveined)
  • 1 small onion
  • 1 cup frozen peas
  • 1.5 cups uncooked jasmine rice
  • 2 cloves garlic, minced
  • 1 tsp grated fresh ginger
  • 2 cups water
  • 1/4 cup soy sauce
  • 2 Tbsp brown sugar
Instructions
  1. If your shrimp is frozen, thaw it first by placing in a colander and running cool water over it until thawed (this only takes a few minutes).
  2. Finely dice the onion and place it in the bottom of the rice cooker along with the frozen peas (I did not thaw my peas). Add the uncooked rice, minced garlic, and grated ginger. Stir these ingredients together.
  3. Add the shrimp to the top of the rice mixture, then pour in 2 cups water. Close the lid and set the cooker to the “white rice” setting. The rice cooker will begin to heat and once the contents inside reach the appropriate temperature, it will begin to count down the cooking time (12 minutes for my model).
  4. Once the rice cooker finishes its cooking cycle, let it rest for an additional 5-10 minutes on the keep warm cycle before opening the lid. While waiting, stir together the soy sauce and brown sugar.
  5. Finally, open the lid and pour the soy sauce mixture over the contents in the rice cooker. Use a rice paddle to gently fold the sauce into the rice. Serve hot, with sriracha or sliced green onions if desired.